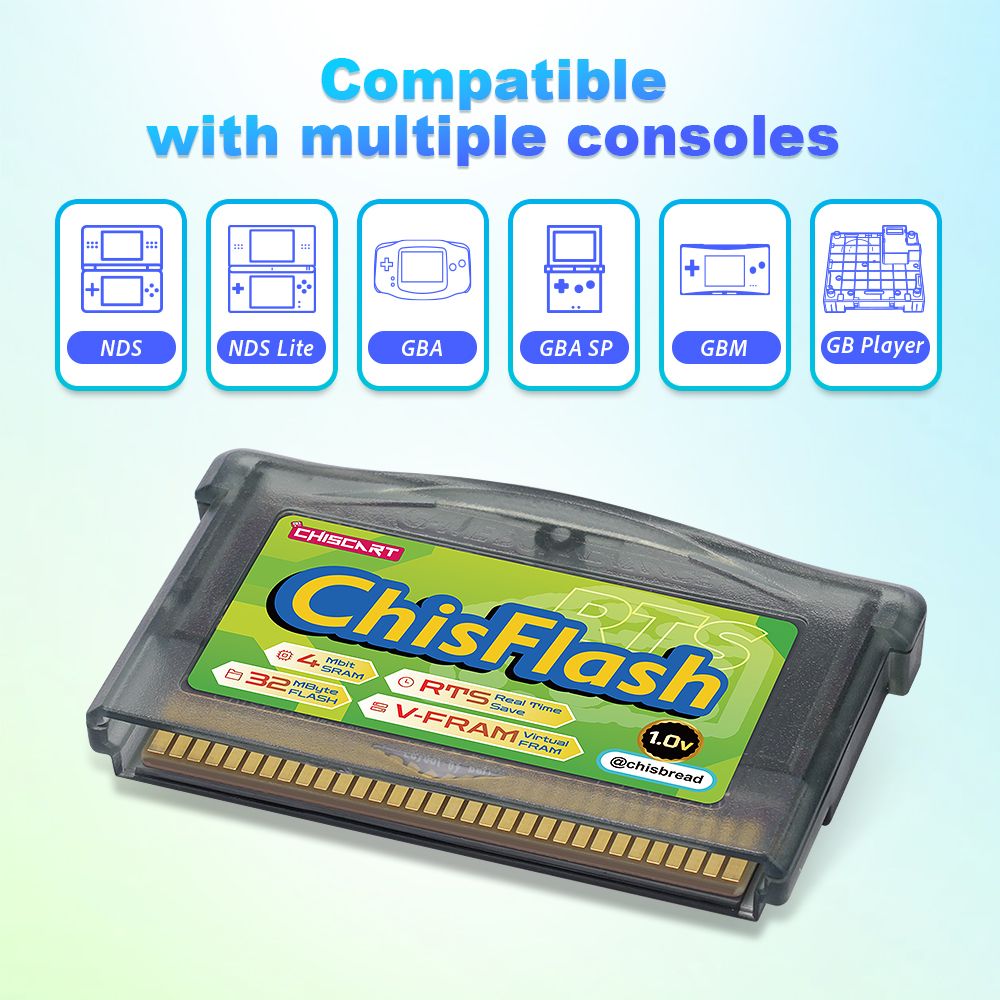
ChisFlash V1.0v Virtual FRAM GBA Flash Cartridge User Guide
1. Tools Required
- ChisFlash V1.0v flash cartridge
- ChisFlash Burner or GBFlash programmer
- USB data cable
- Windows-based personal computer
2. ROM Patching & Preparation
2.1 Verify ROM Save Type
- Download the GBA ROM utility GBA Tool Advance.
- Open the tool and load your target GBA game ROM file.
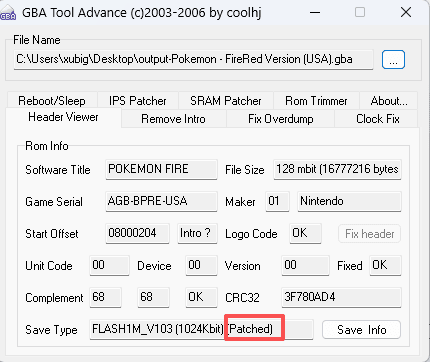
- Check the Save Type field to identify the game’s native save format.
- If the save type is listed as FLASH or EEPROM and no Patched marker appears, you must apply an SRAM patch for the ROM to work correctly with this cartridge.
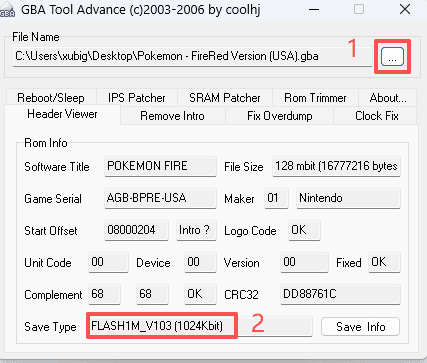
- If the save type is listed as FLASH or EEPROM and no Patched marker appears, you must apply an SRAM patch for the ROM to work correctly with this cartridge.
2.2 Apply SRAM Compatibility Patch
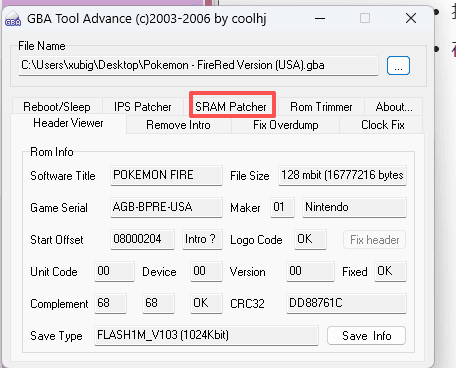
With the ROM loaded in GBA Tool Advance, click the SRAM Patcher button.
 Click the Select button to choose an output folder for the patched ROM, then click Patch to apply the SRAM modification.
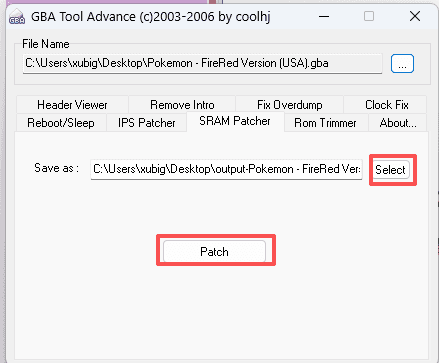
When patching finishes successfully, a new ROM file prefixed with output- will be created in your selected folder. This file is the SRAM-patched version.
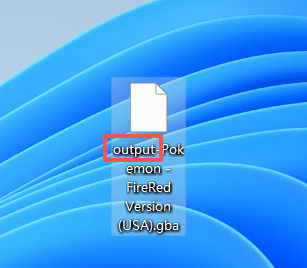
To confirm the patch was applied correctly, open the new output- ROM in GBA Tool Advance. The Save Type line will now display a [Patched] label.
2.3 RTS Real-Time Save Patch (Optional)
This step adds real-time save state support and cheat code functionality. Only perform this step if you need these features.
- Navigate to the web-based ChisFlash 1.0V RTS patcher in your browser:
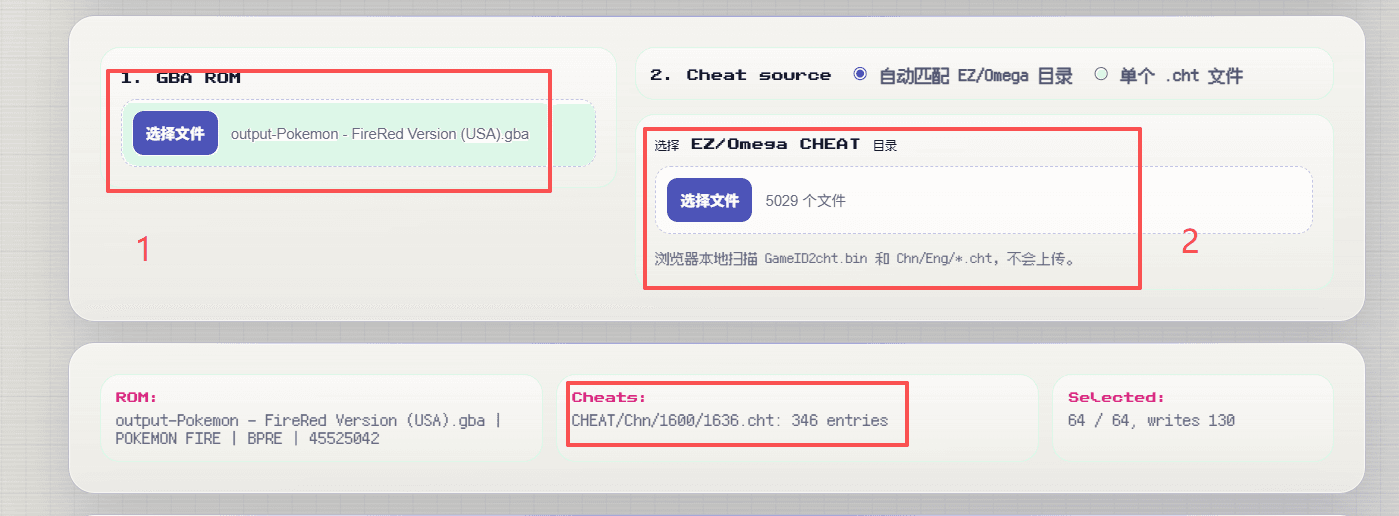
https://gbarts.ausar.xyz/ - Click Select File and upload your SRAM-patched GBA ROM.
- To enable cheats, select your EZ-Flash cheat library folder, or load a single
.chtcheat file. In folder mode, the tool matches cheats by Game ID locally in your browser — no data is uploaded to an external server. - If you do not have a cheat library, download the official EZ-Flash Omega cheat pack:
https://www.ezflash.cn/zip/omegacheatlibrary.zip
- To enable cheats, select your EZ-Flash cheat library folder, or load a single
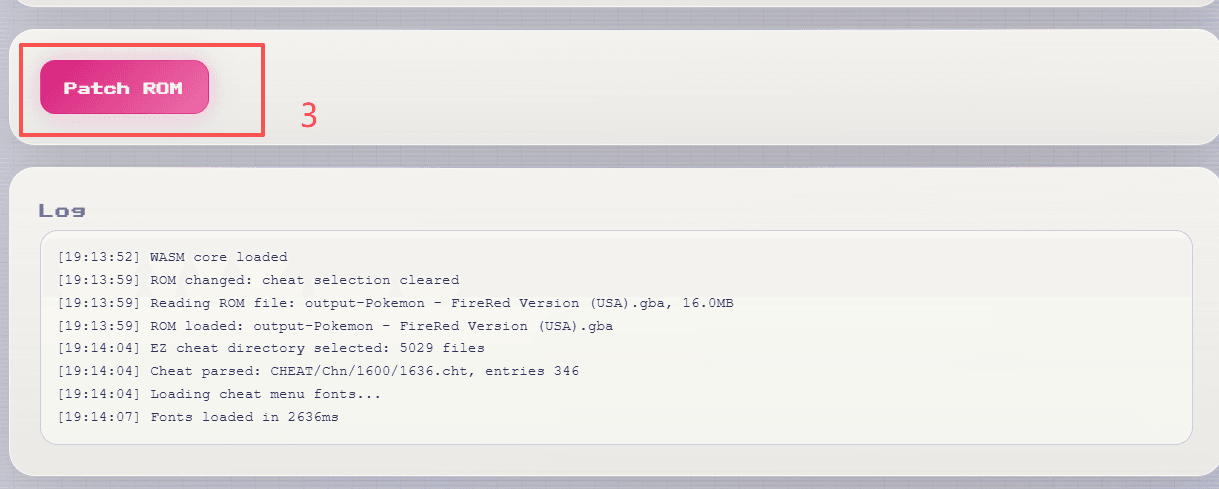
- Click Patch ROM to build the final ROM with RTS and cheat data integrated.
3. Flash ROM to the Cartridge
Caution
We recommend using ChisFlash Burner or GBFlash to write ROMs to the ChisFlash V1.0v virtual FRAM cartridge. This guide demonstrates the process using ChisFlash Burner.
- Insert the ChisFlash V1.0v cartridge into your programmer, then connect the programmer to your PC using a USB-C cable.
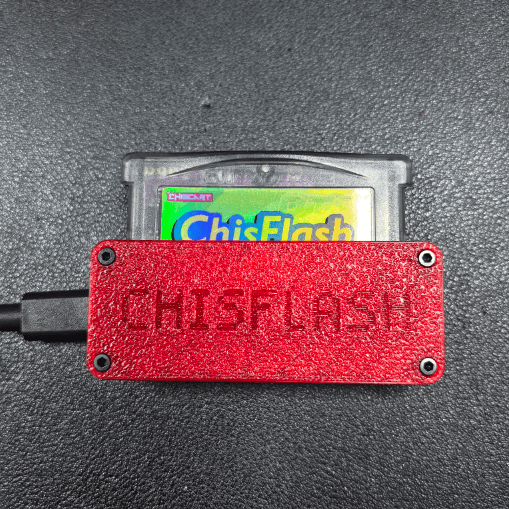
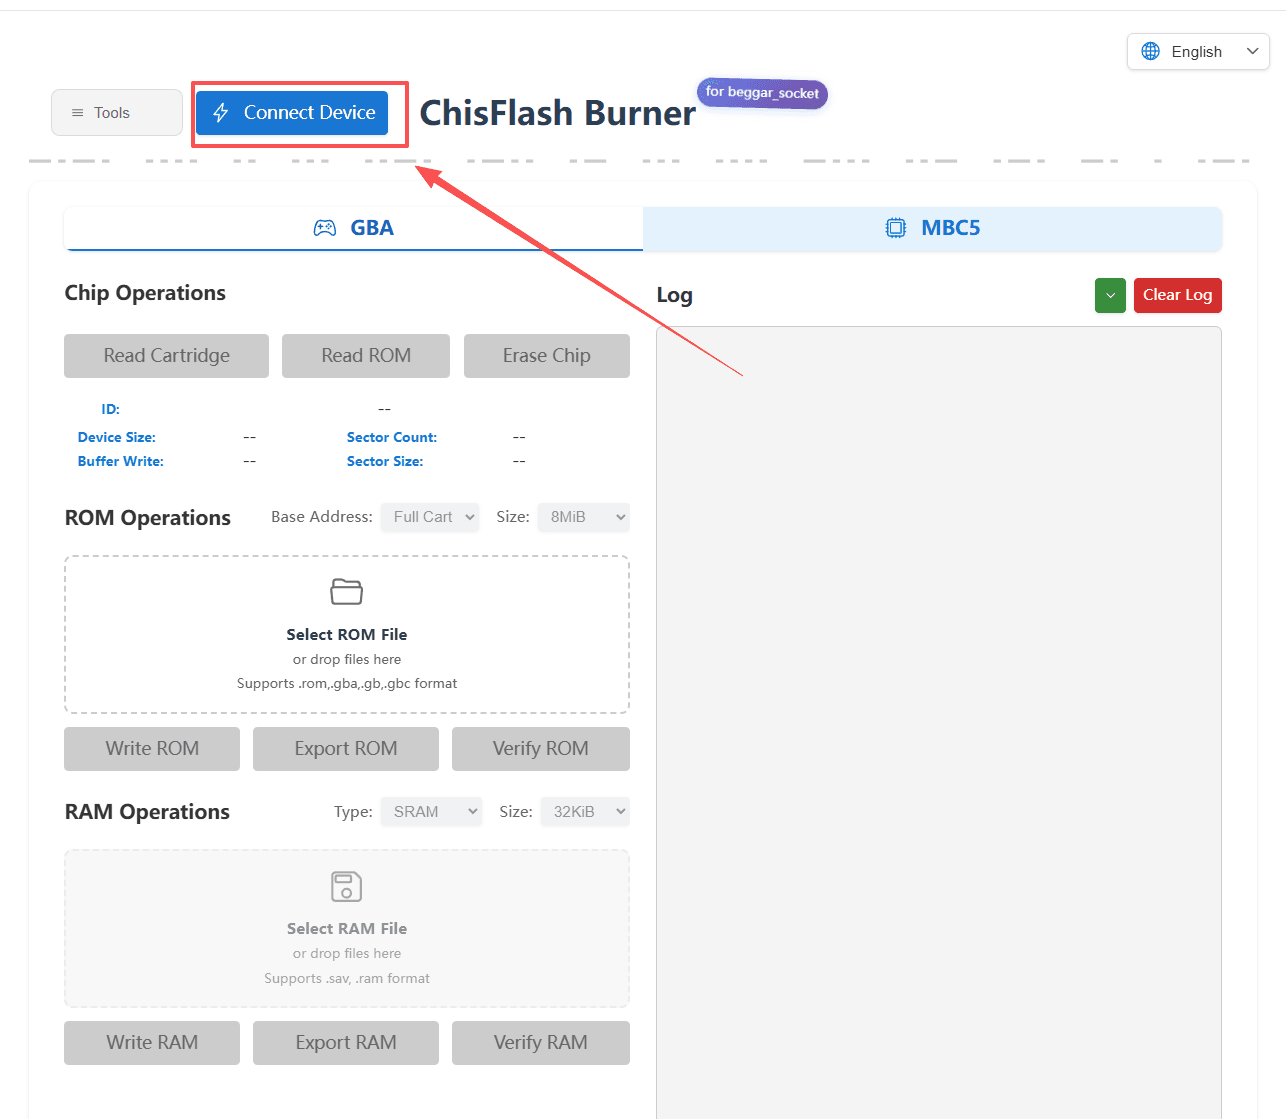
- Launch the web-based ChisFlash Burner application:
https://tautcony.xyz/beggar_socket/#/
Click Connect Device.
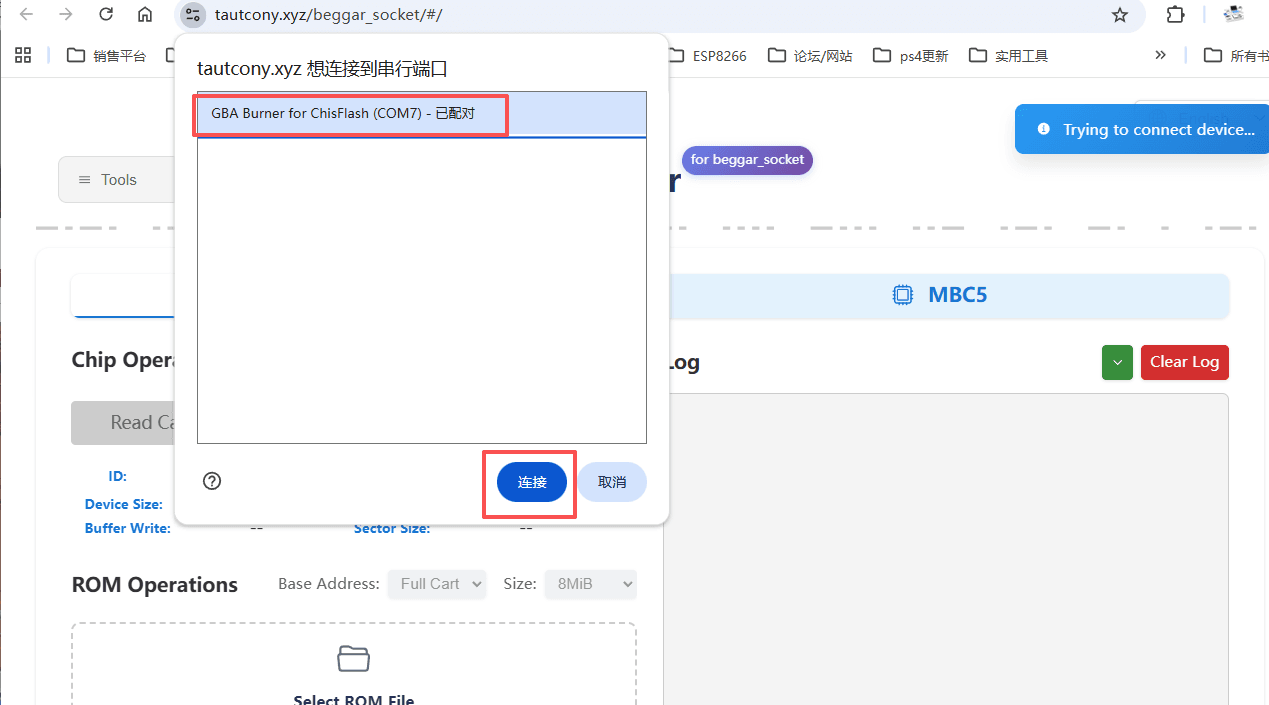
- Select your programmer device from the popup list and confirm the connection.
- Switch to the GBA tab, then click Read Cartridge. A success notification will appear when the cartridge is recognized. If detection fails, remove and reinsert the cartridge then try again.
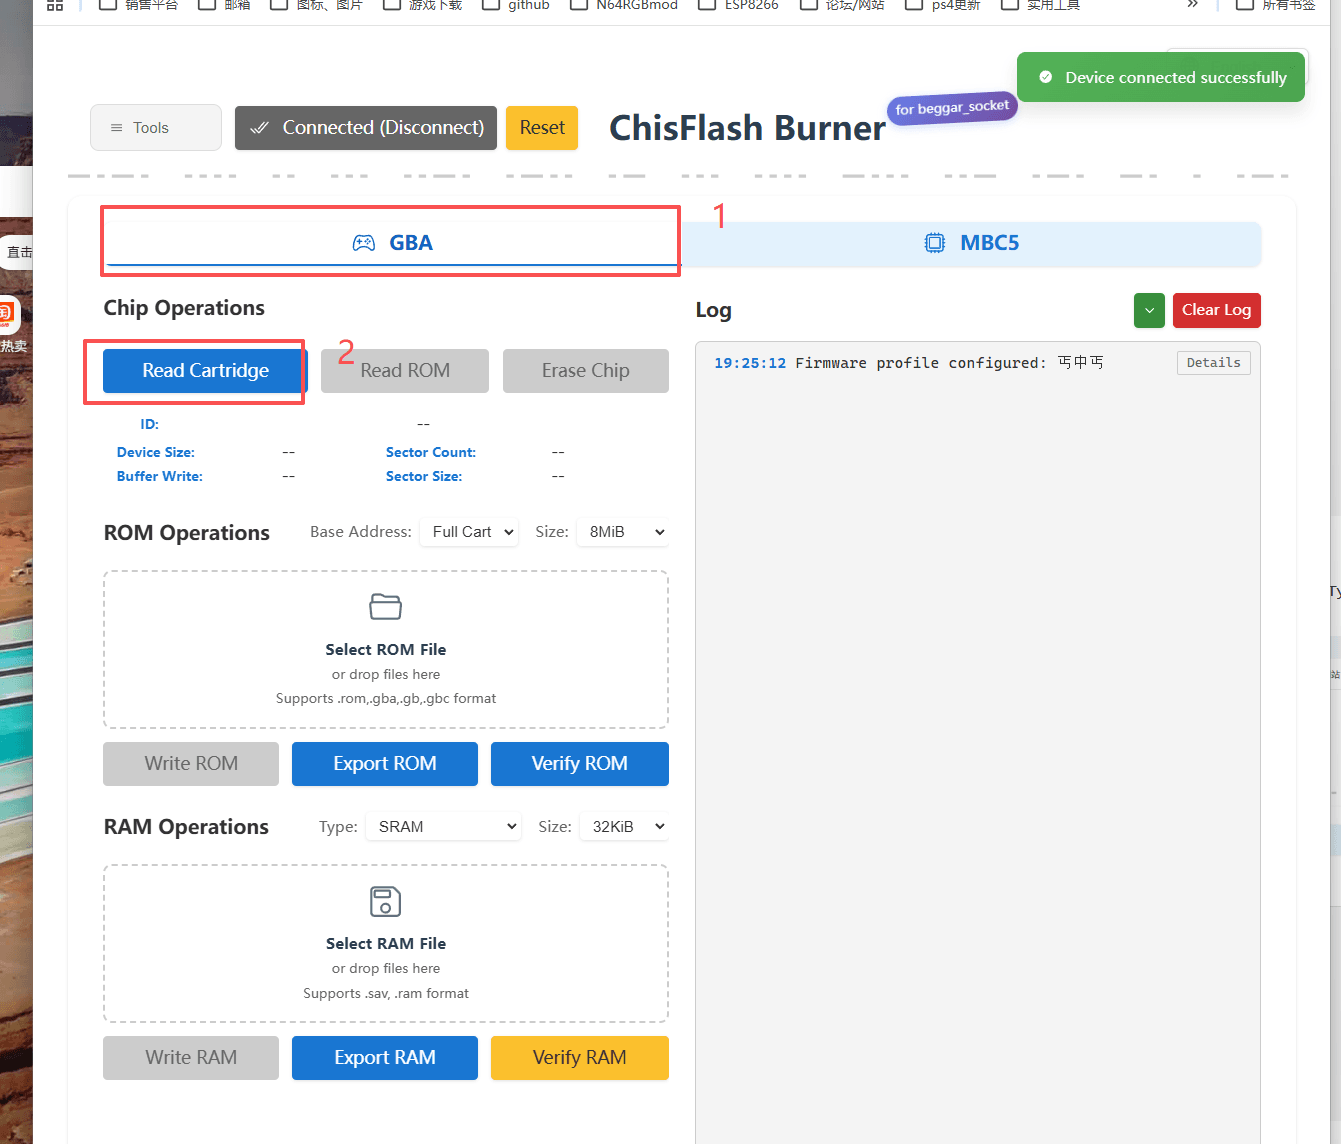
- Click Select ROM File and choose your fully patched ROM file.
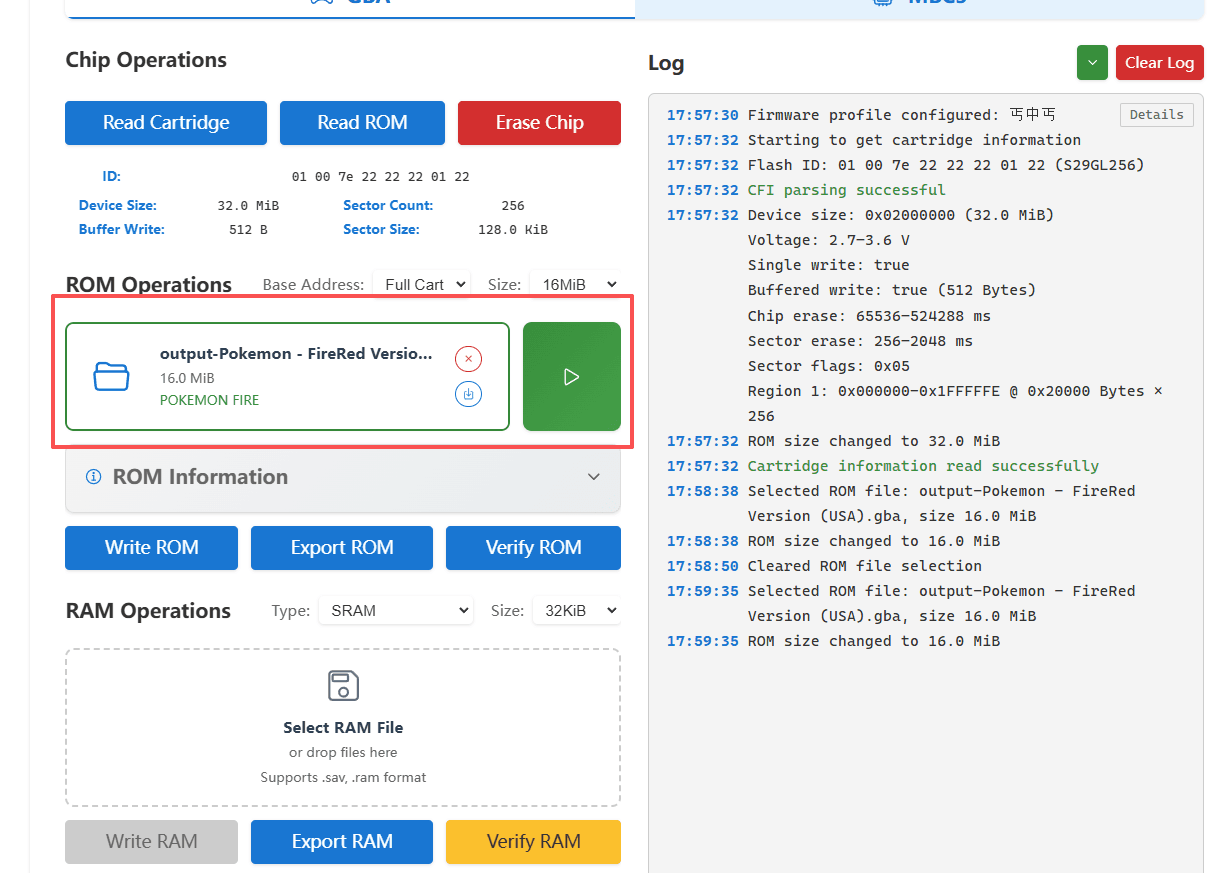
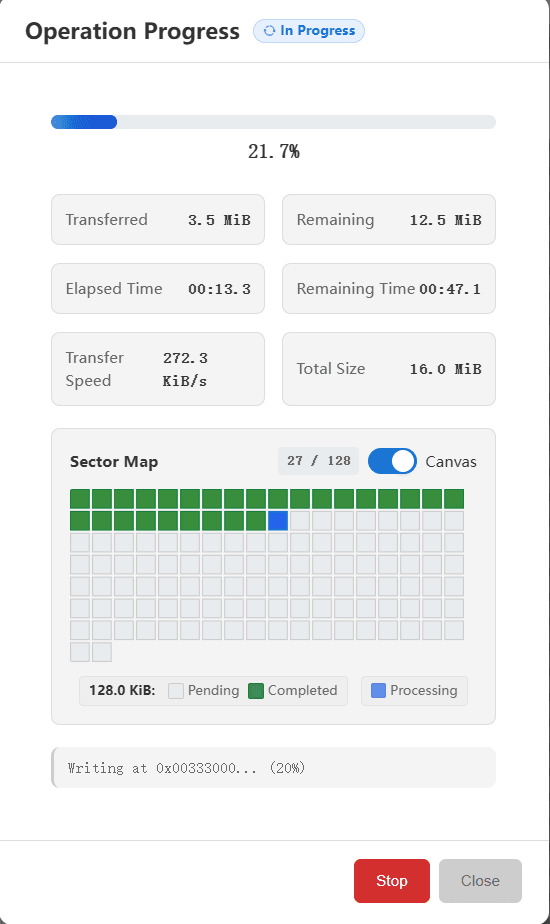
- Click Write ROM to start the flashing process. Wait until the progress bar reaches 100%.
4. Save File Management
4.1 Export Save Data from Cartridge
- Follow the steps above to connect to the programmer and read the cartridge.
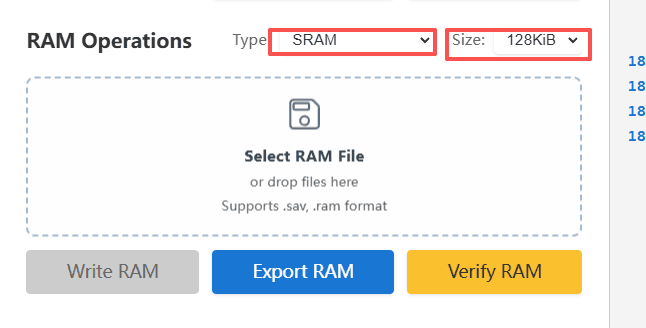
- Under the RAM Operations section, set the type to SRAM 128KiB.
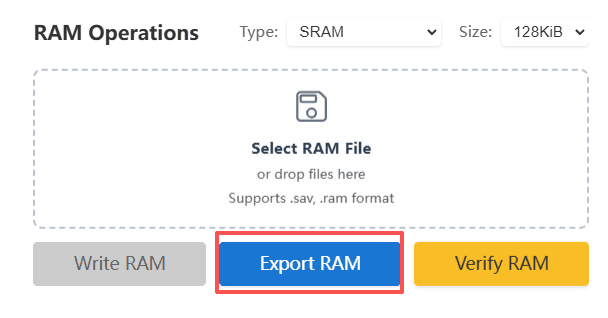
- Click Export RAM to read the save data from the cartridge.
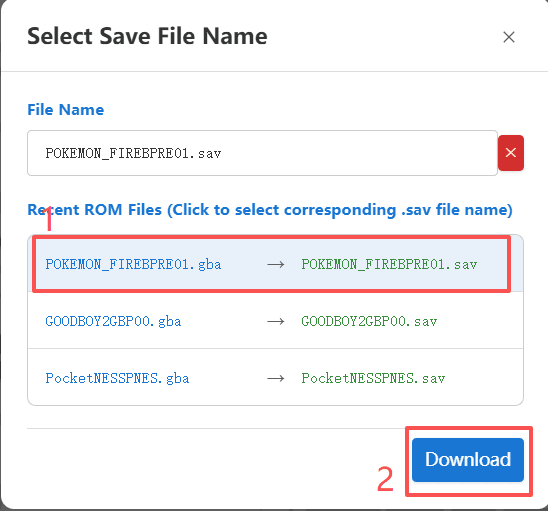
- Verify the save file name, then click Download to save the
.savfile to your computer.
4.2 Write Save Data to Cartridge
Note
If using GBFlash / FlashGBX to write save files, you must set the
AutoPowerOffparameter in the FlashGBX config file to5000. Save writes will fail without this adjustment. See the setup instructions at the end of this guide.
- Under RAM Operations, set the type to SRAM 128KiB.
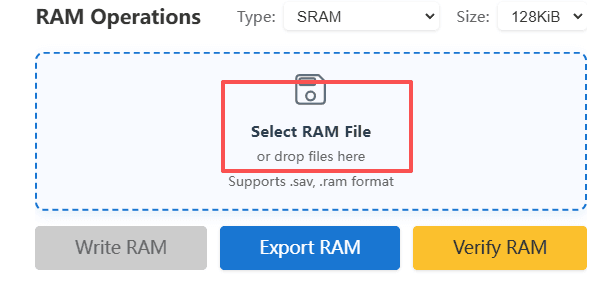
- Click Select RAM File and choose your
.savor.ramsave file.
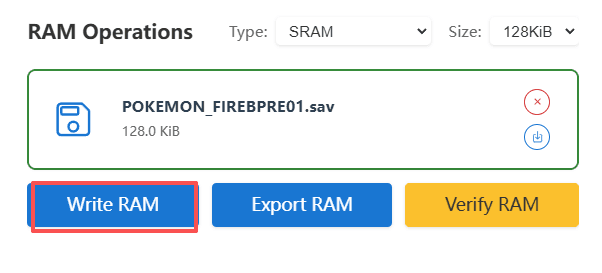
- Click Write RAM to write the save file to the cartridge.
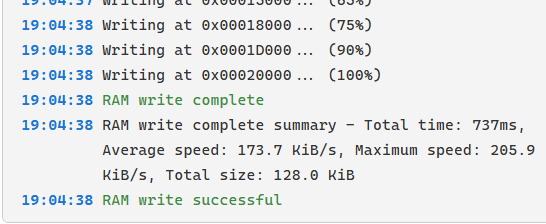
- When the write process finishes, disconnect the programmer, remove the cartridge, and insert it into your GBA console to play.
Appendix: FlashGBX Auto Power-Off Configuration
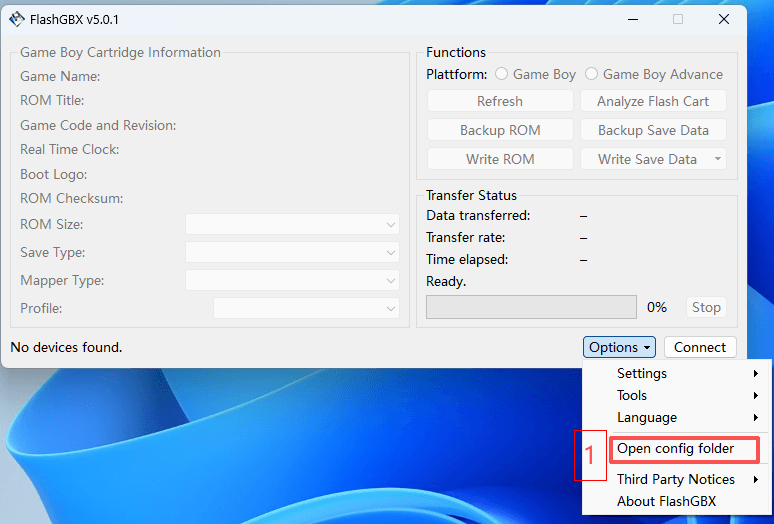
- In FlashGBX, go to Settings → Open config folder to open the configuration directory.
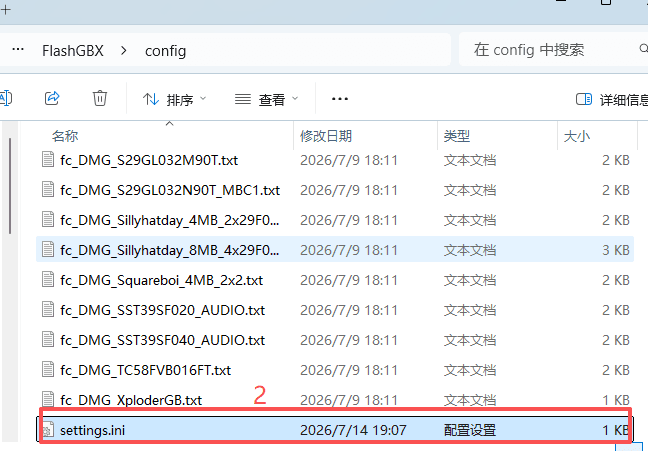
- Open the
settings.inifile in a text editor and locate the[General]section. - Change the
AutoPowerOffvalue to5000as shown below, then save the file.
AutoPowerOff = 5000